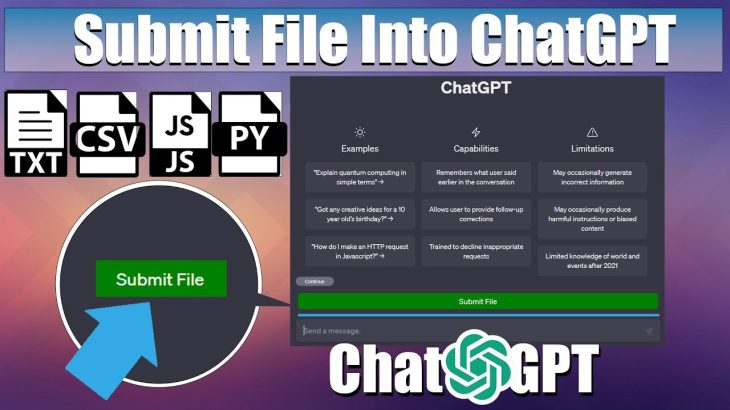
In this video, I’ll show you how to upload files into ChatGPT, a powerful language model based on the GPT-3.5 architecture. With this code, you can easily upload text files, JS files, Python files, and even CSV ‘s to ChatGPT and get accurate responses to your prompts.
But that’s not all – I’ll also show you how to turn this code into a Chrome plugin or a booklet using ChatGPT! This will allow you to access ChatGPT and upload files directly from your browser or a downloadable booklet, making the process even more convenient.
So whether you’re a developer looking to integrate ChatGPT into your project or just someone who wants to make the most of this powerful language model, this video has everything you need. So don’t wait – watch now and start uploading files into ChatGPT today!
Chrome Plugin :
ChatGPT File Uploader
https://tinyurl.com/5n7rjhar
Prompt:
“Generate a Js script that creates a button with the text ‘Submit File’ and inserts it into the DOM before an element with the class ‘.flex.flex-col.w-full.py-2.flex-grow.md:py-3.md:pl-4’. The button should have a green background color, white text color, 5px padding, no border, 5px border radius and 5px margin. The script should also create a progress element and insert it into the DOM before the same element. The progress element should have a width of 99%, height of 5px and a grey background color. Inside the progress element, there should be another div element representing the progress bar with a width of 0%, height of 100% and blue background color. When the button is clicked, it should create an input element of type ‘file’ that accepts ‘.txt’, ‘.js’, ‘.py’, ‘.html’, ‘.css’, ‘.json’ and ‘.csv’ files. Once a file is selected, using an async it should be read as text and split into chunks of size 15000. using async Each chunk should be submitted into a conversation by doing the following:
async function submitConversation(text, part, filename)
const textarea = document.querySelector(“textarea[tabindex=’0’]”);
const enterKeyEvent = new KeyboardEvent(“keydown”,
bubbles: true,
cancelable: true,
keyCode: 13,
);
textarea.value = `Part $part of $filename: nn $text`;
textarea.dispatchEvent(enterKeyEvent);
.
The progress bar should be updated after each chunk is submitted within the for loop as follows
progressBar.style.width = `$((i + 1) / numChunks) * 100%`;
and should also check if chatgpt is ready with this code:
chatgptReady = false;
while (!chatgptReady) {
await new Promise((resolve) => setTimeout(resolve, 1000));
chatgptReady = !document.querySelector(
“.text-2xl > span:not(.invisible)”
Once all chunks have been submitted, the progress bar should turn blue.”
Stop Wasting Time Copying and Pasting Code Snippets from CHATGPT- Use This!
Make and Save money building Plugins with ChatGPT – Part 1 #chatgpt #openai #plugin
ChatGPT Made a game in under 7 minutes!:
Create Your Own Meme Generator Web App Using ChatGPT and Flask in 4 minutes | Step-by-Step Guide:
Build a website with ChatGPT in 3 minutes #chatgpt #openai
On this channel, you will find tutorials on how to access and utilize OpenAI’s ChatGPT. you will discover the amazing world of OpenAI’s ChatGPT. Imagine being able to have a conversation with a computer about anything under the sun! Thanks to ChatGPT, it’s now possible, and I’m here to show you how. With my engaging tutorials, you’ll be able to access and use this revolutionary technology like a pro. So buckle up and get ready to take your conversational skills to the next level!
Subscribe to our YouTube Channel : https://www.youtube.com/@automatemylife00/